![]() Pocono Raceway has long been recognized as one of the NASCAR’s most competitive speedways. Road racing has been at Pocono almost as long. The Sports Car Driving Association is please to return to Pocono Raceway. Pocono’s unique 2.5-mile road racing circuit has accommodated the most exotic sports cars in the world, including IMSA GTP cars. The course features eight turns; two S’s and straightaway up to 3,055 feet long. The track width varies from 45-100′. Its great racing and location, in the heart of the Pocono Mountain resort area has made Pocono Raceway a favorite destination of race fans and vacationers.
Pocono Raceway has long been recognized as one of the NASCAR’s most competitive speedways. Road racing has been at Pocono almost as long. The Sports Car Driving Association is please to return to Pocono Raceway. Pocono’s unique 2.5-mile road racing circuit has accommodated the most exotic sports cars in the world, including IMSA GTP cars. The course features eight turns; two S’s and straightaway up to 3,055 feet long. The track width varies from 45-100′. Its great racing and location, in the heart of the Pocono Mountain resort area has made Pocono Raceway a favorite destination of race fans and vacationers.
Highlights of an SCDA Event at Pocono Raceway
- Driving at a track with history and character dating back to 1968
- Long straights and a variety of turns on the infield road course
- Upgrade to modern safety standards, adequate run off areas and modified turn design to accommodate modern racing and driving needs.
- Easy access to the paddock for trailers
- NASCAR quality garage building
- Premium classrooms, offices, restrooms, timing and scoring tower, concessions stands
- Multiple driving configurations.
- Top class safety fencing and barriers
- Fuel station on site.
- Participants can expect four on-track driving sessions, lead/shadow instruction or one on one In Car Instruction if needed, and up to three Classroom Sessions. In an effort to provide maximum levels of safety, quality, and fun at our events, the SCDA will provide trained and certified flaggers at the corner stations. This ensures that our drivers can focus on one thing- improving their driving skills. This event is geared towards all skill level drivers, from Novice to Advanced.
- A limited number of arrive and drive rental Spec Miatas are available for this event.
- SCDA Data and Video Coaching- SCDA is offering professional data and video coaching at our events. This is an affordable and individualized program that will help you take your driving to the next level. Our coaches are accomplished racers and industry experts that are able to pinpoint areas for improvement. Together you’ll come up with an action plan to help you achieve your goals.
- Garage Bays are available for rent.
2026 SCDA Schedule of Events at Pocono Raceway
The SCDA will host two dates at Pocono Raceway this season!
- May 30-31- North/South Option 5 MEGA Course- 3.5miles long
- August 31-September 1- North/South Option 5 MEGA Course-3.5miles long
Download the Daily Schedule for Pocono Raceway- May 23-24, 2025-Sample
Event Price
Pocono Raceway event entry fees are $449 retail ($599 for novice group, includes instructor for lead/shadow or in car based on restrictions and/or request).
Save $50 and pay only $399 for one day if you register 2 months prior to the event.
Save $25 and pay only $424 for one day if you register 1 month prior to the event.
TRACK MAP
Click here to see the course map.
POCONO Raceway (3.5mile Mega Course)- Turn by Turn Track Guide
POCONO Raceway (3.5m Mega Course) Turn by Turn Track Guide
Pocono Raceway (Mega-Course Counter-Clockwise) – Turn by Turn Track Guide
3.51 Mile Lap
NASCAR 1 (SCDA 1) – When crossing the Start/Finish line, the car should be positioned up close to the wall on the right hand side. Approaching the turn, we want to draw our attention overhead to the cones hanging on the fence, driver’s right. They are marked just like brake number boards, beginning with a row of 3 cones, then 2, then 1, then at the (0) board is a traffic light. The amount of braking is highly car dependent, but ensure speed adjustment is completed by the time we turn in. Halfway between the 1 cone and the traffic light is a reference for turn in, slowly and smoothly bending the car down towards the inside of the banking.
NASCAR 2 (SCDA 1) – As we bend the car down to the inside of the banking, we will notice white squares painted onto the asphalt. Position the car so that we are straddling these squares. Big stretch of the eyes here, looking far ahead and out of the very top left hand portion of the windshield. Be very smooth with any throttle adjustments here as the car is heavily loaded on the side and traveling at a good speed.
T2 – Approaching this corner, continue to run over the last white square and that will help you open up steering to position the car mostly driver’s right. We do not need to be alongside the wall here, a couple car widths is preferred. We will shoot for a fairly hard brake as we straighten the wheel, and will gradually trail the brakes smoothly into the corner as we turn in proportionally. Aim to be off of the brakes at the transition from oval to infield, there is a bit of a bump here. Smoothly squeeze throttle once we can straighten steering out of the turn.
T3 & 4 – Turn 3 is a subtle jog to the left, but the brake zone for T4 comes during. The apex of T3 is really just the left side of the road, and we want to position the car tight left by the time we pass the curbing. We will brake fairly hard here but we want our steering wheel straight as we crest the hill halfway through our brake zone for T4. This means we do not want to continue to hold left as we crest the hill, we want to prioritize a straight steering wheel which means the car may arrive 3/4ths left by the time we turn in for T4. We do not need to use all the road on the entry here. Getting the eyes up and to the right, we will smoothly trail off the brakes and get tight, not on top of, the apex curbing. Gradually squeeze power once the eyes tell the hands they can straighten out of the turn.
T5 – After tracking fully left out of T4, bring the car back over to 3/4ths right, aiming for a slightly late apex in anticipation of having the car fully left and fully settled for the brake point of T6. Usually a slight lift here is appropriate, but keep any throttle adjustments smooth.
T6 – For this corner, we are using a late apex strategy and not tracking out fully in preparation for T7. We can brake reasonably late & hard, as it’s important to “load” the front of the car. The turn in here is roughly halfway down the length of the entry curb on driver’s left, aiming to apex at the very end of the curbing. Delay initially throttle just slightly to keep load over the front, continuing to change direction and only tracking out to passenger side tires on the center seam of the road. This will make it easier to get the car fully back to the right to set up for T7.
T7 – For this turn, the car must be positioned all the way to the right by the time we turn in. It’s ok to brake at a slight diagonal towards the right side edge of the road, as we aren’t much past the track out of T6 at this point. This is a great corner to practice trail braking. Aim for a later apex, and a good turn of the steering wheel. Good slower speed corner to practice making “big inputs” in a lower consequence area. Practice a smooth release of the brake, and a smooth squeeze of throttle once the eyes show that steering can unwind.
T8/9/10 – This is a very rewarding corner sequence when you get it right. Exiting T7, hustle the car back over left aiming towards the entry curb. At about the ½ mark down the curb you should be turning in. This will put you about mid track as the entry curb disappears from the peripheral driver’s left. This means you are about 2 car widths wide of the apex. Get the eyes up early, and aim for one turn of the steering wheel, one radius around T9+10. The “turn in” for 9 is when the car is next to the access road on driver’s left, but the “one radius” philosophy begins after the turn in of T8. Approaching the curb at T10, the angle of your car should be such that you can open up steering, unloading the left side suspension allowing the left side tires to drive over the curbing. The feet should remain smooth here, and acceleration only occurs once steering is gradually unwound.
T11&12 – Approaching T11 is a great corner to practice threshold braking, or braking at a 10/10ths pedal to see how well your car can slow down. The car should be positioned fully alongside the right hand edge of the track. Finding a braking reference here is challenging. The turn is a car length or so before you get to the curbing on the right, and this will aim you towards a traditional apex driver’s left. The trick here is this apex is where two perpendicular sections of track join, with no curbing. As such, it’s easy and tempting to “shortcut” the track by driving the left side tires through the grass. Keep all 4 tires on the pavement. Exiting T11, use the full width on driver’s right and begin a smooth throttle squeeze. Getting closer to T12, there is a transition (from infield course to oval) so hold a maintenance throttle until after the car “lands” from going over this bump.
T13 – This corner is much like NASCAR 1&2 and is the oval section of track. Most of your speed adjustment should be done in a straight line here. At turn in, the car should be just about a car width from the wall on driver’s right. Smoothly bend the car in, once again aiming to run over the white squares which are down about 7/8ths of the way towards the inside.
T14 – Approaching the brake point of T14, we can use the traffic light on the fence as a reference for braking. Much like T11, good, strong threshold brake here. Bend the car in as you smoothly ease off the brakes. There is a transition bump here at the apex, so we always hold no more than a maintenance throttle until after this bump. Once the car settles over the bump at the apex, throttle can be squeezed smoothly as steering is reduced. You only need to track out 7/8s left here, as we will need to get back over left for T15
T15 – Approaching T15, the car should be positioned 7/8ths left, aiming for a turn in point a tough before the end of the entry curb on driver’s left. There typically is a light brake here, soft and smooth on and smooth off. We are aiming for an apex at the end of the apex curb. This is a great corner for practicing using the full width of the road at exit. Pick up the eyes, unwind the hands to bring you right to the edge of the road.
T16 – On the approach to this turn, the car should be fully alongside the right hand side of the road. The brake required here is a medium pressure for a medium duration. A good reference for braking is around when the gravel road appears on the right. Think of slow hands turning in, aiming for a later apex.
T17 – Oddly enough, this corner is a mirror image of the advice for T15. The only difference being, we don’t want to fully track out, we need to position the car for T18 so leave a couple car widths at the track out.
T18&19 – This corner is a great corner to practice high eyes. Extremely high eyes. It’s easy to get disoriented here as the width of the track changes, getting wider. Typically a slight, smooth throttle lift is appropriate here, with steady hands as well. Keep the eyes up and the hands slow. Once the outside wall is within sight, focus on understanding that you need to be parallel to it going down the front straight. This is what orients you.
Author: Jonathan Goring
Pro Driver Coach
www.jonathangoring.com
Want an analysis on your own driving? Check out Jonathan Goring’s Remote Coaching page for more information on purchasing a Driver Performance Analysis Session of AiM, Vbox or Garmin files.


SCDA-POCONO Mega Course Track Day- May 30-31, 2026

SCDA-POCONO Mega Course Track Day- September 5-6, 2026
Track and Event Information
Location / Directions
DIRECTIONS
Physical Address:
Pocono Raceway
1234 Long Pond Road
Blakeslee, PA 18610
Pocono Track Policies
TRACK WEBSITE
General track information can be found here:
Track Policies and Procedures:
Concessions and Fuel
Food is available for purchase at the track- but may be limited at times. Please check before event.
Fuel is available onsite- 98 octane and 100 octane
Noise Restrictions
Noise Restrictions:
No restrictions
Track Damage
Track Damage:
Pocono Takes great pride in the quality of the track and facilities. Charges for any damage to safety barriers or other equipment are the responsibility of the driver involved.
Shipping to Pocono Raceway
Shipping to Pocono Raceway:
Ship to the track address. See the track office to collect packages
TRACK WEBSITE
General track information can be found here:
Track Policies and Procedures:
Automotive Services
coming soon
Safety Information
Helmet Requirements
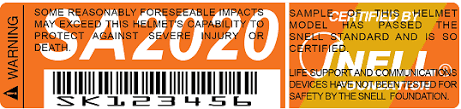
Helmet Requirements for all SCDA events.
Helmets with a SA-2020 rating or higher are REQUIRED for all SCDA Events
Helmets with an M-rating are not Acceptable. Motorcycle helmets do not have the proper safety requirements for car use, specifically a rollbar multi-impact test.
Helmet Suppliers:
Dress Code
Long sleeves and long pants are suggested at all tracks. Open-toe shoes are not allowed. Drivers of competition cars are encouraged to wear fire-suits.
Convertible Policy
SCDA Convertible Policy
For safety reasons, all convertibles (Boxster, Miata, Corvette, BMW Z4, Honda S2000, Pontiac Solstice etc.) are required to have a roll bar that meets the following two criteria in order to be eligible to run during any event.
- The roll bar must be in the fixed position and visible at all times. This means that roll bars which are designed to automatically deploy are not acceptable unless they are in the full upright and locked position at all times.
- The roll bar must allow the driver to pass the “broomstick” test which means that the top of the drivers helmet must be below the line from the top of the roll bar to the top of the windshield.
There are aftermarket roll bars and/or seats which can be used to help meet these requirements. If your convertible meets these standards, then you are welcome to participate!
Most retractable Factory hard tops are acceptable at SCDA events, please verify.
Passengers
The ONLY time there may be a passenger on track is:
- If the Driver is a registered SCDA Instructor or Coach
- If the Passenger is a registered SCDA Instructor or Coach
- Non-entrant passengers MUST sign in and receive the proper wristband
Tech Inspection
Tech Inspection
All Cars must be brought to Tech Inspection prior to entering the track.
- Participants should bring their completed SCDA Tech Form to inspection with their helmets.
- Vehicles must be empty of items and have the numbers attached that are in the driver packet
- NOTE: Please visit Registration to get the event packet with the vehicle numbers in it. We cannot inspect a car that does not yet have the tech form and car numbers.
Lodging / Attractions
SCDA Discount Lodging near Pocono Raceway
Area Lodging Suggestions
HOTEL INFORMATION
Lodging and Dining options can be found here:
Pocono Raceway Hotels and Attractions
Stay at the Track
Stay at Pocono Raceway
Camping is allowed.
Pocono does not allow people to stay in the garage/paddock area like some tracks. There is a separate camping setup in what NASCAR refers to as the Driver Owner Lot, adjacent to the garage.
Pocono wants to keep race vehicles separate from camping, so they do no want people using a camper spot as a paddock space, as there are other people that just camp in these spaces, they limit the “Restricted Race Vehicle Access” to just the garage/paddock and not the camping area.
Fee is $60.00 per night – with full hookups 50 AMP, Water and Sewer.
Pocono requests that all campers book online prior to their arrival.
Local Attractions
Lodging and Dining options can be found here:
Pocono Raceway Hotels and Attractions