
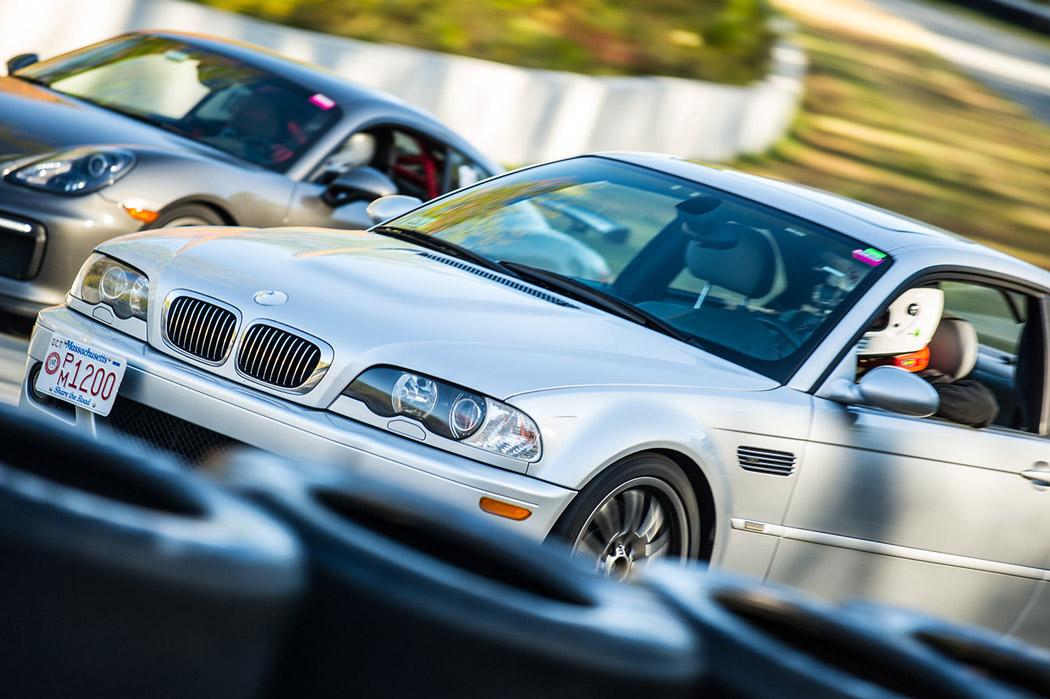
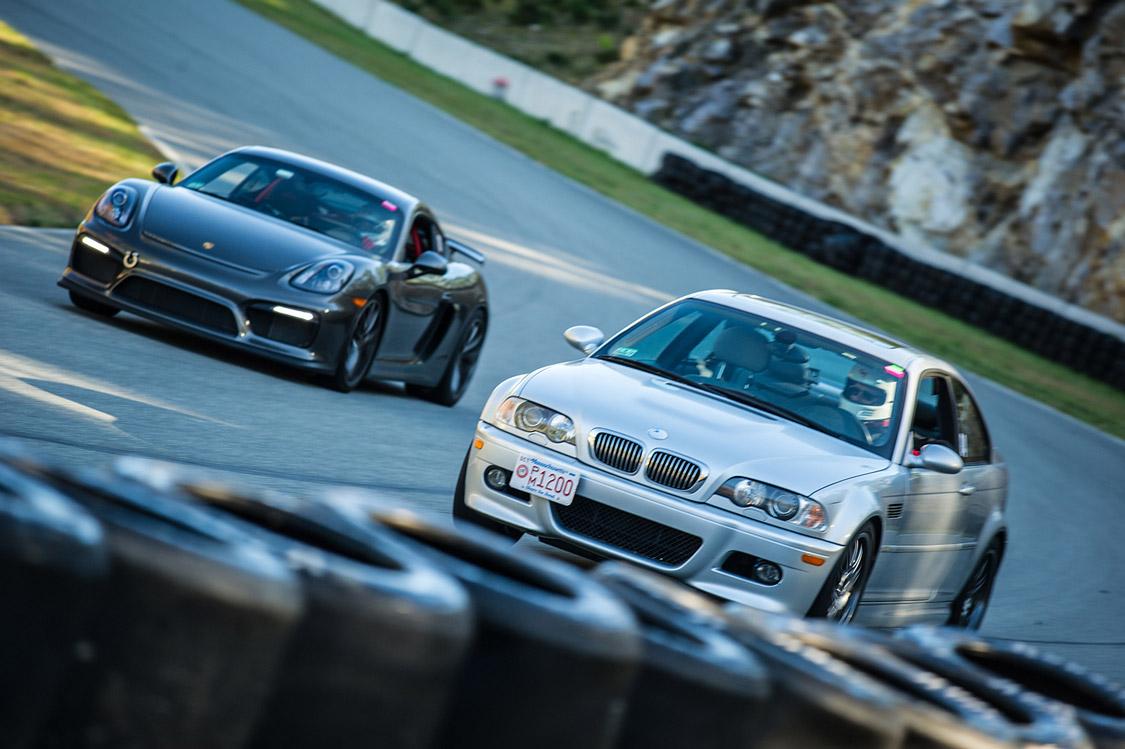
The Palmer Motorsports Park High Performance Driving Experience
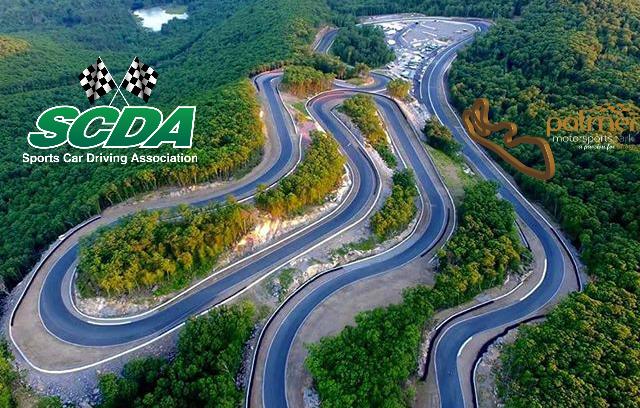
 What do you get when you combine Bathurst, Laguna Seca and the old Bridgehampton? One of the best drivers’ track around, the new Palmer Motorsports Park! SCDA is excited to be hosting events at Palmer Motorsports Park this year. We will be running dates in the counterclockwise direction and in the clockwise direction.
This Thrilling 2.3 mile motorsports facility in Palmer Massachusetts. is simply amazing!
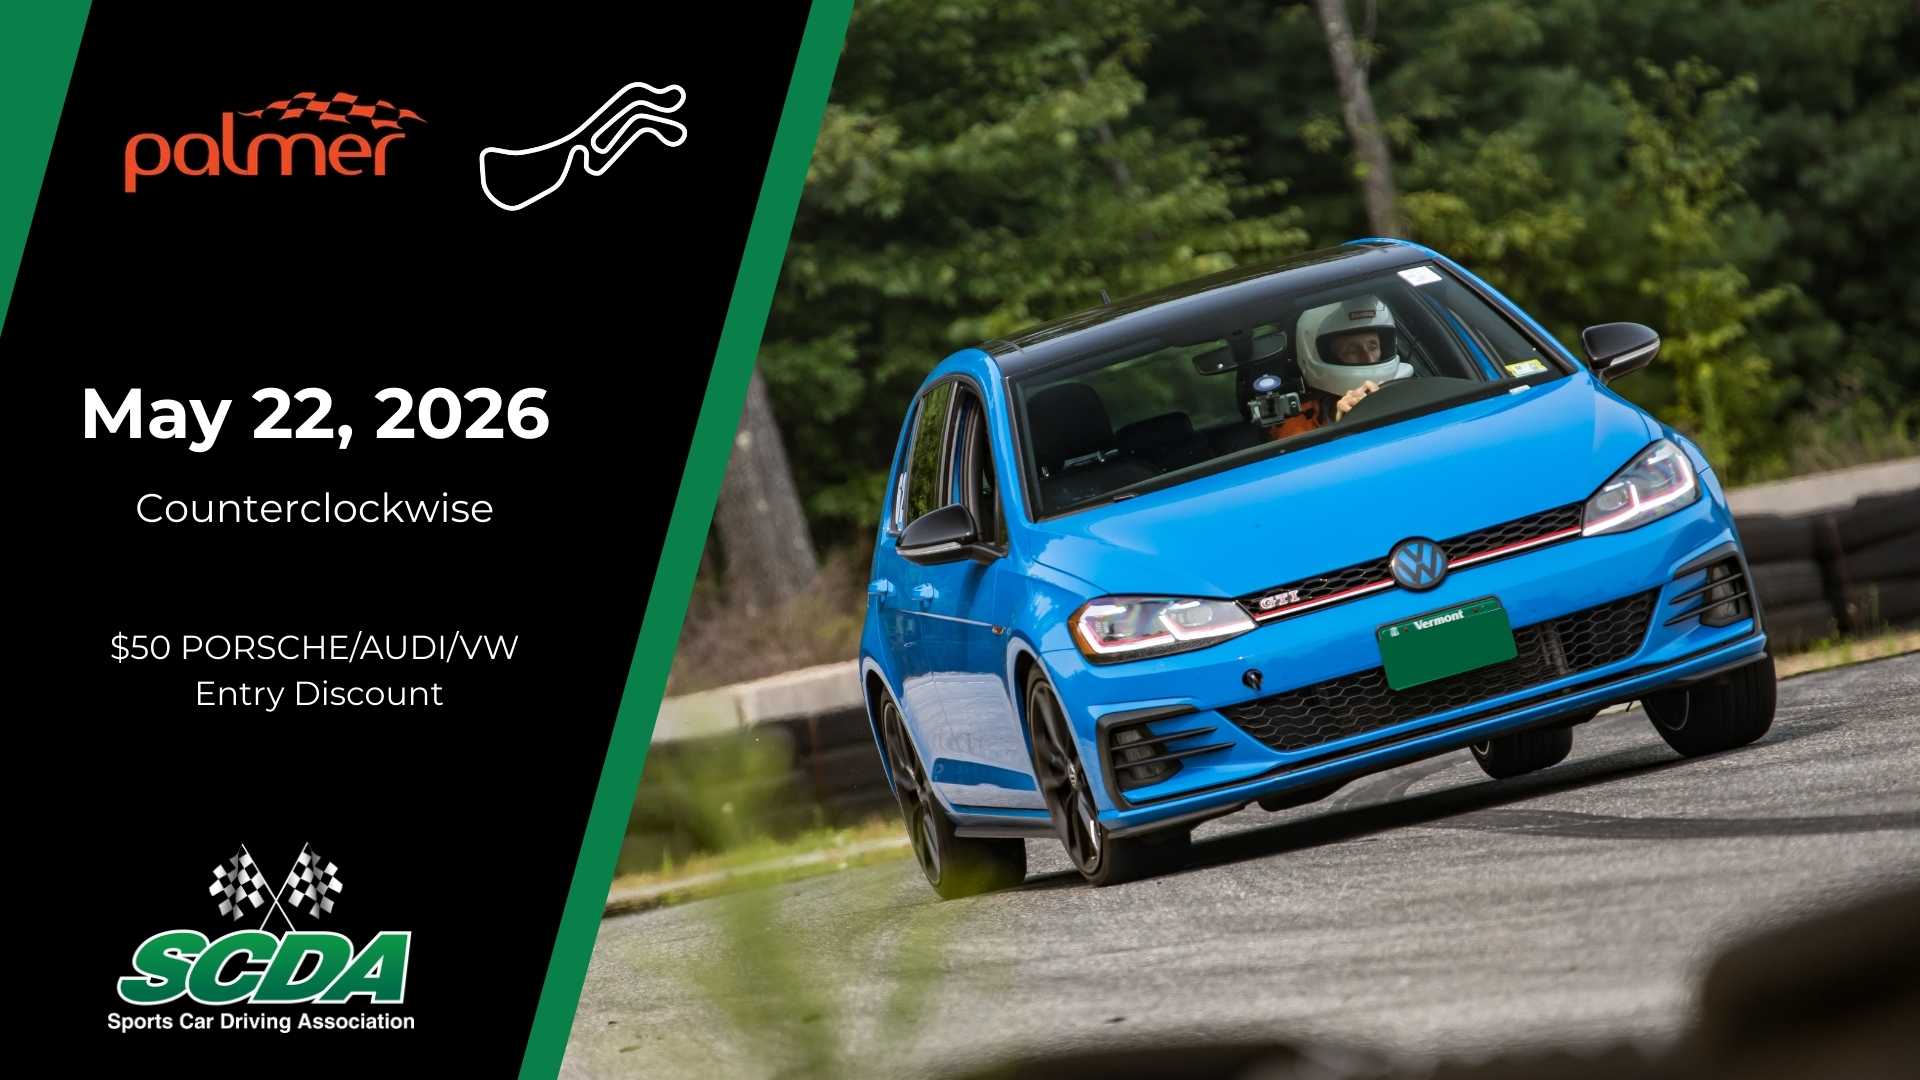
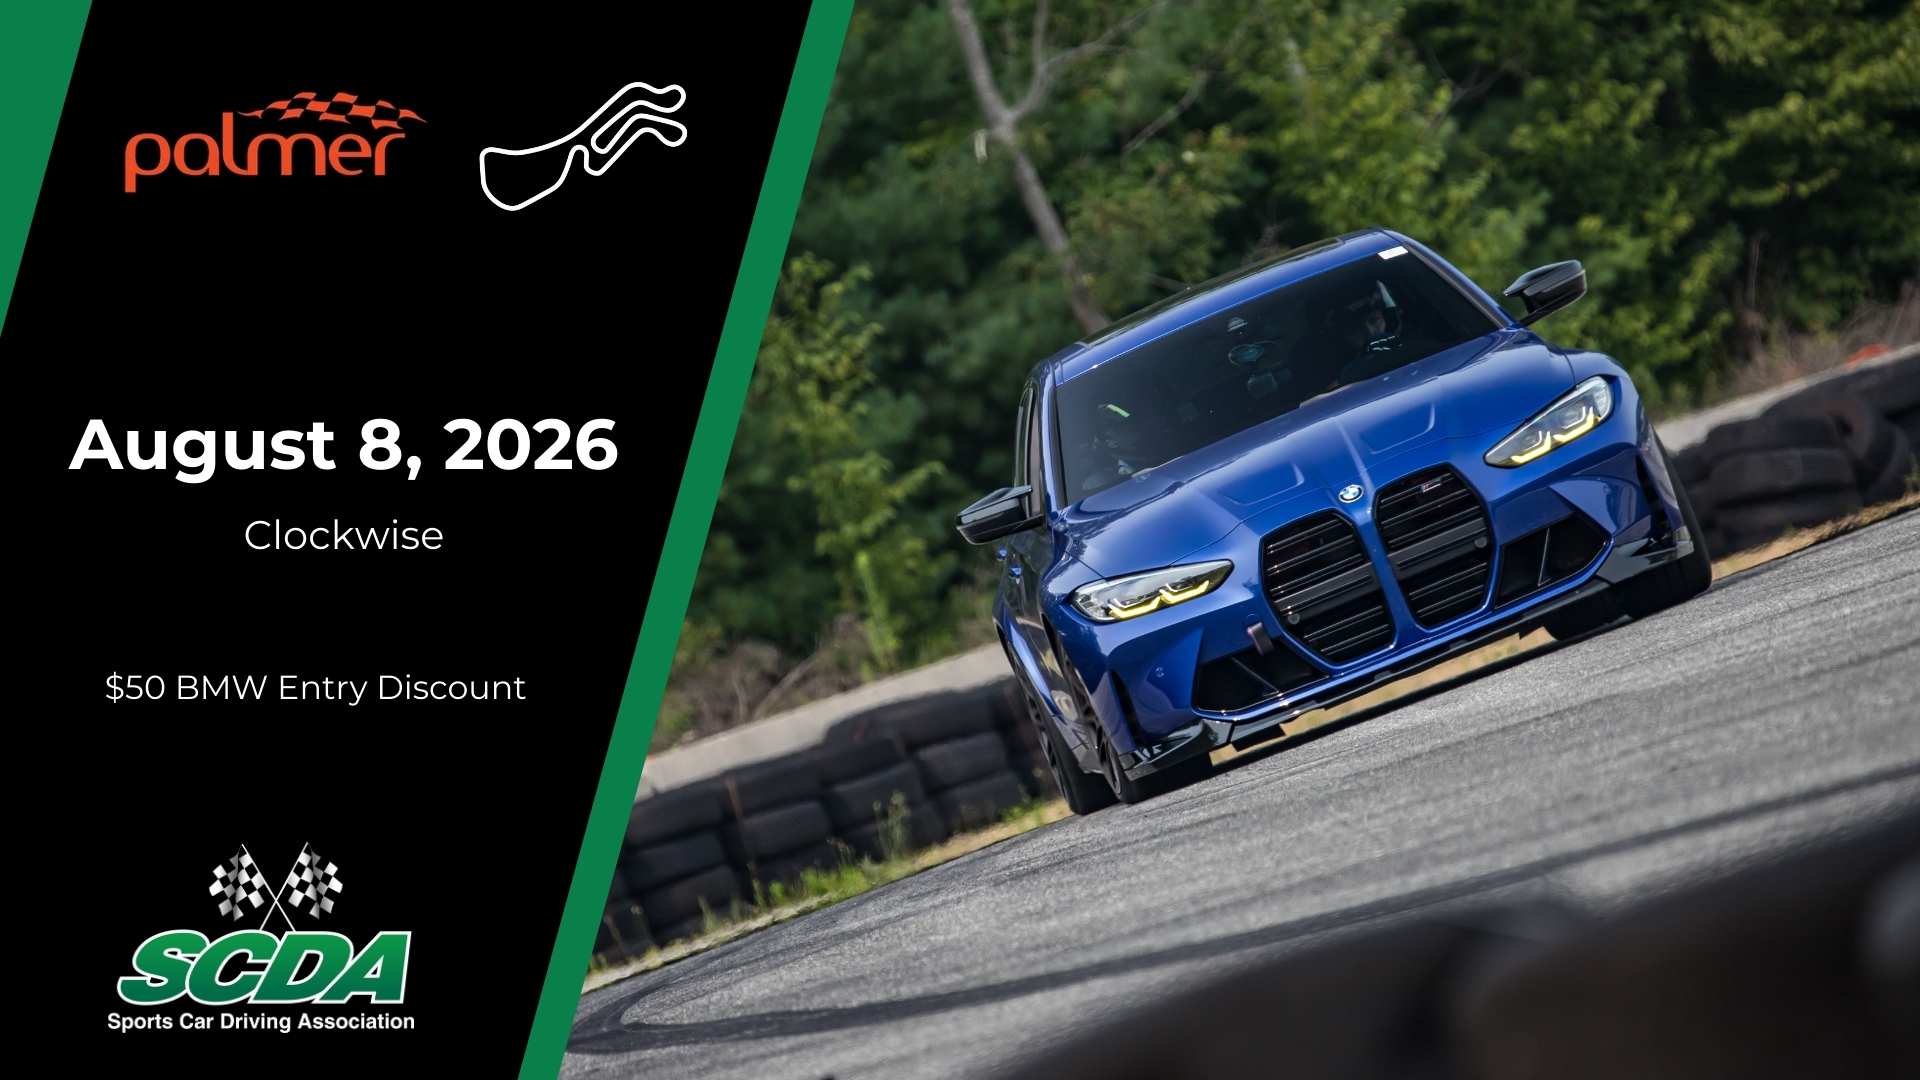
2026 Dates include: May 22nd (counterclockwise) and August 8th (clockwise).
Highlights of an SCDA Event at Palmer Motorsports Park
On Whiskey Hill 7 miles off the Turnpike is Palmer Motorsports Park (PMP), the first true road course in Massachusetts. Created for driver training, testing, and competitive events, Palmer Motorsports Park is a place to pursue your passion for racing and winning.
Whiskey Hill Raceway: 2.3 miles long, 40-feet wide, 190 feet of elevation in an alpine wilderness. Designed by grassroots racers and professional designers and carved from Whiskey Hill granite (courtesy of J Read Corporation) Whiskey Hill Raceway is a one-of-a-kind roller coaster ride.
- SCDA Data and Video Coaching- SCDA is offering professional data and video coaching at our events. This is an affordable and individualized program that will help you take your driving to the next level. Our coaches are accomplished racers and industry experts that are able to pinpoint areas for improvement. Together you’ll come up with an action plan to help you achieve your goals.
- Private Driver Coaching is available with 2015 SCCA Spec Miata National Champion Jonathan Goring. Please call Jonathan if you would like his Coaching Services (860) 485 5736.
SCDA Palmer Motorsports Park Track Events & Schedule
2026 Palmer Motorsports Park Events will include: 5/22 (Friday) and 8/8 (Saturday)
Event Price:
All Palmer Motorsport Park track event entry fees are $449 retail ($599 for novice group, includes instructor for lead/shadow or in car based on restrictions and/or request).
Save $50 and pay only $399 for one day if you register 2 months prior to the event.
Save $25 and pay only $424 for one day if you register 1 month prior to the event.
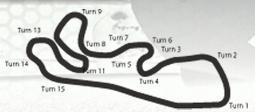
Palmer Motorsports Park- Turn by Turn Track Guide
Palmer Motorsports Park (CounterClockwise)- Turn by Turn Track Guide
Palmer Motorsports Park (Counter-Clockwise) – Turn by Turn Track Guide
2.3 Mile Lap
Start/Finish – The road gradually bends to the right here, position the car dead center of the track going over the start/finish line, if anything *slightly* just to the right of center.
T1 – Approaching the brake point for T1, position the car tight to the right side of the road. Since the road continues to curve to the right past our brake point, we will need to both brake and turn at the same time. This means that a “hard” brake can only be a maximum of 80% or so, as we need to prioritize holding right until our turn in. Since the road curves right, the turn in point is more a release of right hand down steering rather than a turn to the left. At this moment, we can briefly increase our brake pressure closer to 100% as we leave the edge of the road, before eventually trailing off the brakes smoothly as we turn left hand down into the corner. The apex zone here is alongside the cones, hugging the apex for a zone to the tune of 3-4 car lengths. The release from apex and subsequent squeeze of throttle should only occur once the cue from the eyes comes that steering can be gradually unwound. The track out point can come up rather “quick” so start by holding the apex too long before releasing and then gradually shorten up the apex zone and release sooner.
T2-3 – Car placement in this corner is critical. We want to hold ¾ left all the way down the hill through T2 until the turn in point for T3. You actually do NOT want to use all the road here on the driver’s right, as the very edge of the track provides no grip or options and the important factor is stretching the eyes up and left, it’s easy to lose track of where the right side tires are. Looking way down track, it should be easy to establish an apex reference for T3 and a natural line should follow. Don’t obsess over details with the line here (such as using every inch of road) focus on overall trajectory. Be very steady with throttle position here and be smooth and incremental with any adjustments. Steering should be slow and smooth but deliberate if needed to change direction.
T5 – In this corner the most important factor is being tight to the right at exit to get a good line through T6. We will get there via a double apex philosophy with a tight entry, float to mid track, and steer back into to stay tight at exit. Think of this as a “V” shaped line with 2 apex and a big turn in the middle, rather than a “U” shape line with consistent direction change. Let’s use this double apex philosophy but stay just a touch wide, ½ car width or so of the first apex. A *reasonably* late brake can pay off here to keep load over the nose, allowing a smooth trail brake release into the corner. It helps to delay initial throttle typically to help the car change direction to stay tight at exit.
T6 – This corner has a significant uphill section after it, making the momentum out of the corner most important. This means keeping it smooth and tidy in the way in, don’t rush entry speed. You want a neutral apex with a zone of about 2-3 car lengths, not a single late apex point. It’s ok to get the car tight to the apex early in the corner, so long as the mid corner speed allows the car to continue hugging the left hand apex for 2-3 car lengths. The cue for acceleration comes once the eyes tell the hands they can unwind out of the corner. Use every bit of track on the way out of the corner to minimize bind in the chassis up the steep hill.
T7 – The turn in here is typically earlier than you think as a common mistake is staying too left too long approaching the corner and missing the turn in point. You can turn in fairly early here as long as you also turn in SLOWLY. This will ensure the car meets the apex on the right side, allowing you a smooth line down the hill approaching T8. The speed adjustment is usually just a lift in most cars, but can be a soft brake in some, just keep any speed adjustments longer and more subtle, not late and abrupt. This is especially important as there is a gradual crest of a hill here as you turn in and approach apex. Almost always stay in the higher gear here to avoid upsetting the car over the hill.
T8 – The corner is significantly downhill up until the last 20% or so when it flattens out, causing the car to compress on it’s suspension, increasing grip potential. This corner is a double apex, meaning our left side tires should be tight to the curb on the left on the way in. You can carry the brake *reasonably* deep in here, just be sure to get the eyes up and left no matter what. There is a center seam in the road, and the widest you want to come between the two apexes is passenger side tires on seam. That puts the car just a tick tighter than mid track. With the eyes up and to the left hold onto a steady maintenance throttle and with the compression of the hill the car should want to tighten up for a second tight late apex. Keep everything smooth here, and look up and to the left no matter what.
T9 – This is a fairly high speed corner with a small speed adjustment beforehand. The line here is neutral, neither late nor early. In most cars a small lift off throttle is sufficient, but if speed adjustment is brought post turn in just keep throttle smooth. You can use the full width of the road at exit, no need to pinch it in anticipation for the next corner.
T10 – After tracking out fully to the right of T9, we begin bringing the car to 7/8ths left by the time we brake. We do not need to use all the road at the entry. Brake hard initially to leave room for a gradual release of the brake as the car hits the camber. The road is heavily cambered here once you initially bend into the corner, but the camber slowly diminishes and the road is mostly flat by the time you get to the apex. Think of this corner as a wide entry, mid road in the middle, and patience bringing it down to one singular late apex. Squeeze throttle once the cue from the eyes comes to unwind hands.
T11 – This corner is all about car placement for T12 & T13a/b. It’s critical that our right side tires are tight to the apex here, next to (but not on top of) the curbing. A slight *tickle* of the curbing is okay and encouraged as it’s a non-visual reference point to prove you hit the apex. Straight line speed adjustment before the corner and maintenance throttle during the corner is preferred here to balance the chassis. Be very smooth with any throttle adjustments through here.
T12, T13a/b – This is a textbook decreasing radius corner. This means that the corner is initially a gradual turn, but then it tightens up as you progress through. The line here can be a bit counterintuitive initially but it works great when you get it right. Simply, through T12 and into 13, hold the very inside (left) side of the track up until your brake point. Now, you have the full width of the race track to have the car accept a hard brake, and transition to more middle of the road. The car will naturally want to go straighter more when you brake, which means it makes no sense to stay wide initially in anticipation of the corner tightening up. The brake itself brings the car more middle of the road, maybe you can open up steering a couple degrees to support. At this moment, the car is very sensitive to brake release. Make sure the eyes are up, identify the apex of T13a, and gradually ease off brake pressure and turn harder to point the car towards the apex. The priority is getting the car tight to the apex of T13a to make the straightest shot possible onto the front straight.
T13b – This corner is about fundamentally making the straightest shot possible through with the goal of turning the steering wheel the least. Being said, the apex curb is pretty tall here, the car will handle better if you stay off of the apex curb here. Often hardly any speed adjustment, potentially just a throttle lift.
T14 – This corner is important to remain on maintenance throttle until you are sure that you can begin the rest of the throttle squeeze. The sensation of a long maintenance throttle is normal here as the road continues to bend to the left. Always wait for the eyes to tell the hands they can unwind steering coming out of the corner, and then begin a smooth acceleration out of the turn.
Author: Jonathan Goring
Pro Driver Coach
www.jonathangoring.com
Want an analysis on your own driving? Check out Jonathan Goring’s Remote Coaching page for more information on purchasing a Driver Performance Analysis Session of AiM, Vbox or Garmin files.
Palmer Motorsports Park (Clockwise)- Turn by Turn Track Guide
Palmer Motorsports Park (Clockwise) – Turn by Turn Track Guide
2.3 Mile Lap
*Note: Turn numbers stay the same regardless of track direction*
T14 – Approaching the brake point for T14, the car should be tight to the left side of the road. A good reference for braking is within the vicinity of when the tire wall begins on the driver’s right. Because this is a high speed corner that requires both braking and turning, we must carry a longer, lighter brake. NO advantage to pushing the brake point here. The turn in is typically near the beginning of the concrete entry curb on driver’s left. Critical to get the eyes far down the road into the corner and remain smooth with both inputs from the hands and feet. Apex tight next to the curb to position for T13b.
T13b&a – The “turn in” for 13b is simply the smooth release of the steering from 14, with the fundamental goal of making the straightest possible line on the way in. The car should be tight to the apex through 13b, but not on the curb. After 13b, the hands should remain as straight as possible to get to a tight to the right side of the track all the way around 13a. This whole area from apex of 14 to 13a is “light on the feet” meaning no significant acceleration/deceleration.
T13a, T12, T11 – Beginning this corner sequence, the car is glued to the right side of the road going around 13a. There is of course an apex in T12, so we do want to treat these two corners as a double apex, releasing the car to the middle of the road in between. This is especially important in higher horsepower cars, giving them the opportunity to smoothly squeeze power down through T12. A good reference for “middle of the road” is driver’s side tires on the center seam. Very important to get the eyes up early, only squeezing throttle once the sight pictures show steering can be straightened. Once at the apex of T12, simply make the straightest line you can, getting tight to the apex of T11 as well. Use the full width of the track at track out.
T10 – This corner increases in both camber and elevation but only begins in the second half of the corner. Approaching tight to the right side of the road, a later harder brake should be used to properly load the front of the car. When sneaking up on a later brake point, always go incrementally using references. The turn in as around the end of the entry curb on driver’s right, but commit only to a *partial* apex here. This will be a double apex philosophy but we will stay a car width wide of the first apex on the way in. In between the apexes, smoothly come off the brake and let the car float to the middle of the road. At this point, camber and elevation increase and the car will gain grip potential. This is when a more decisive steering input can be used to get the car tight to a second apex. Track out only 7/8th to the right because we need to get back fully to the left in anticipation for T9.
T9 – This corner is a high speed right hander, where the speed adjustment can be brought post turn in point, typically a smooth release of the throttle as were bending the car in. Keep everything smooth here and get the eyes up early. Overall trajectory is more important than using every inch of road here, so prioritize getting the eyes as far ahead as possible even if it means leaving a little extra track at turn in. Use a traditional “wide-tight-wide” line philosophy here.
T8 – Approaching this corner, the car should be tight to the left side of the road. The speed adjustment will be long and light, much like entrance to T14 as we have a small amount of steering going in. the turn in point will be right when the “extra road” appears to driver’s left, we will not use any of this extra road. The trajectory through the corner will be almost identical to the T9 strategy of double apex philosophy but stay wide of the first one. This means the initial entry into T8 will probably be tighter than you think. As the slope of the hill begins to transition uphill, we will allow the car to float to driver’s side tires on the center seam, before making another steering input into the second apex of T8. The road is significantly uphill at this point, so it’s very important to have the car settled and controlled through the apex to get a good drive out of the corner.
T7 – This corner is steep uphill initially but has a gradual crest to it post apex beginning a very steep downhill straightaway. References are tough here, and the road continues to curve left longer than you think. There is a light pole, and then a row of trees on the horizon which help guide the eyes up and left, signaling that the corner “keeps going.” It is very important to remain smooth with pedal inputs and slow with steering inputs. It’s easy to turn too fast and end up at an early apex, not a good place to find yourself running wide at exit.
Steep Downhill Straight – The car will gain a tremendous amount of speed very quickly here. Prioritize getting on the brakes hard and early initially, keeping the hard brake but moving brake point later incrementally and cautiously. Always get the eyes up and right into the corner even if you accidently find yourself coming in too fast, NEVER look straight.
T6&5 – Approaching T6 on the very left hand side of the road, we will brake hard. We are aiming for a wider entry and a single, later apex. Be mindful of when the car passes over the center seam for consistency purposes. You are aiming to have the driver’s side tires run over “the patch” on the way to the apex of T6. This will position the car at an ideal entry for the next turn. For T5, this is a classic double apex. We will get tight to both apexes, let the car float to the middle of the track, putting the passenger side tires on the seam. We will release brakes smoothly, and practice patience on initial throttle to let the car continue to turn. Only accelerate once the eyes tell the hands they can unwind out of the corner. We are going slightly downhill all the way through here, so the car may feel “on it’s tip toes” this means keep everything smooth here.
T3&2 – In the clockwise direction, think of T3 and T2 as being one corner, with a very long duration apex where we hold the right side of the road. On approach to T2, we will be fully driver’s left. Near the beginning of the tire wall on driver’s left, we will turn in smoothly. We are aiming to apex on the right side of the road just after a set of poles, one of which has a recognizable solar panel attached. From here on, we simply hold the apex tight to the right, under a maintenance throttle up the hill. The cue to release the apex is once the building appears driver’s right, and this sets us up for T1.
T1 – Approaching T1, we want to make sure the car is all the way to driver’s left, but we never use the extra pavement, never crossing the white line. This is a medium brake pressure with a small amount of trail brake. The car is fairly loaded up on the front end here if the brake was reasonably deep so keep the brake release smooth. Avoid touching the sausage curb at the apex as this can terribly upset the car. Accelerate smoothly only once steering is progressively removed from the car.
Author: Jonathan Goring
Pro Driver Coach
www.jonathangoring.com
Want an analysis on your own driving? Check out Jonathan Goring’s Remote Coaching page for more information on purchasing a Driver Performance Analysis Session of AiM, Vbox or Garmin files.
SCDA- Palmer Motorsport Park- Track Day 5-22-26
SCDA- Palmer Motorsport Park- Track Day 8-8-26
SCDA- Palmer Motorsport Park- Track Day 8-8-26
Track and Event Information
Location / Directions
Palmer Motorsports Park Information
Palmer Motorsports Park Website
Address
58 West Ware Road
Ware, Massachusetts
01082
Palmer Motorsports Park Policies
- Dogs are not permitted on site during the major spectator race weekends
- NO drones are permitted
- Open fires are not allowed anywhere on Lime Rock Park grounds (except in approved camping areas) and must be in containers designed for that purpose. NO fires of any sort allowed on ground at any time any where. Small home grills, hibachis and small gas grills are permitted in the paddocks if operated at a safe distance from any flammable sources. Lime Rock Park reserves the right to determine what a safe distance from flammable sources is and what is an acceptable grill or hibachi.
- Lime Rock Park operates under a strict municipal injunction limiting hours of operation and setting noise restrictions. Cars may ONLY be operated on the Course Monday through Saturday, 9:00 a.m. – 6:00 p.m.
- Lime Rock Park shall have the right, at any time, in its sole discretion, to refuse admission to or eject from Lime Rock Park or from any facility in Lime Rock Park any person for conduct which may be unsafe, discourteous, verbally or physically abusive, influenced by alcohol, drugs, or controlled substances, or may otherwise diminish the safety, health, or enjoyment of others on the premises or the conduct of an event.
- We do not allow a non-registerable vehicle under 125cc. Vehicles such as scooters and skating systems will not be allowed to operate on the premises of Lime Rock Park, including but not limited to the Race Course or on access or paddock roads.
- Bicycles are allowed in camping after 6:00 p.m. until dark. Guest Services will advise you when it’s time to put bikes away. Fans and participants may ride bicycles in the paddocks and on roadways. Lime Rock Park reserves the right to impound any bicycles if they are being ridden in an unsafe manner (as judged by Lime Rock Park personnel).
- Alcoholic beverages are permitted in the paddocks and pits fifteen (15) minutes after on-track activity has ceased for the day and until 10:00 p.m. Lime Rock Park has responsibility for ensuring compliance with policies regarding alcohol and/or other intoxicants. Lime Rock Park has the right to suspend driving privileges for any driver found to be out of compliance.
- Quiet time on Lime Rock Park grounds is between 10:00 p.m. and 7:00 a.m.
- Weapons and fireworks are prohibited on Lime Rock Park property.
- Fluid wastes must be placed in approved Lime Rock Park disposal containers located at various sites in the paddocks and NEVER on the ground.
- Persons under 18 years of age are not permitted in the hot pits or at corner stations.
- Children under 18 must be accompanied by an adult while in the paddocks. For their safety and that of others, children must be kept under adult supervision at all times.
- To facilitate emergency vehicle access, race and personal vehicles must not be parked on any paddock road/safety access lane during an Event. Any vehicle not in compliance will be towed at owner’s expense.
- Traffic in A Paddock is directional one way and limited to 5 MPH. Traffic in B Paddock is two-way and is limited to 5 MPH.
- Participants in the Paddock desiring an electrical hookup must not have cords cross or impede any roadway or access area where vehicles or pedestrians cross, unless cords are covered with town and state approved safety cover (e.g., “yellow jacket” or “speed bump”).
- Due to Connecticut law and D.E.P. regulations, no car washing is permitted anywhere at Lime Rock Park. However, washing of tractor trailers and other vehicles by a D.E.P.-compliant vendor with suitable waste water recovery equipment is permitted.
Concessions and Fuel
Palmer Motorsports Park Concessions and Fuel
Palmer Motorsports Park Website
- Gasoline: Race Fuel 93 and 100 unleaded will be available on site.
- Sunoco race fuel 93, 100, and 110 leaded are also sold by Como’s Autobody in 5 gallon cans.
They are located 1 mile from track at the bottom of the hill on Route 67. Fuel is also available at the track.
- Sunoco race fuel 93, 100, and 110 leaded are also sold by Como’s Autobody in 5 gallon cans.
- Gate Hours: Gates open at 7am on the morning of events.
- Garage Rental: Carports and Garages are available at the event. Garages are $75 and Carports are $60
- Camping: Free Camping is allowed! All customers can arrive from 5 PM- 7PM ONLY the night before. The gates will be locked after 7pm, but you are welcome to spend the night.
Address
58 West Ware Road
Ware, Massachusetts
01082
Noise Restrictions
Palmer Motorsports Park has a strict 95db noise limit. Cars that are not in compliance will be given one opportunity to quiet their car. There will be no second opportunity.
Please come prepared with mufflers installed.
Track Damage
Track Damage:
Drivers are financially responsible for damage to the safety equipment and track facilities.
Shipping to Palmer Motorsports Park
Ship to:
Palmer Motorsports Park
58 West Ware Road
Ware, Massachusetts
01082
Automotive Services
Automotive Services
- NAPA Auto Parts** (Ware, 5 miles)
- NAPA Auto Parts (Palmer, 8 miles)
- NAPA Auto Parts (Belchertown, 13 miles)
- Advance Auto Parts (Ware, 5 miles)
- Balicki’s Used Auto Parts (Ware, 3 miles)
- O’Reilly Auto Parts (Ware 5 miles)
- Pease Antique Auto Parts (Palmer, 8 miles)
- Bertera Chevrolet** (Palmer, 8 miles)
Safety Information
Helmet Requirements
Helmet Requirements for all SCDA events.
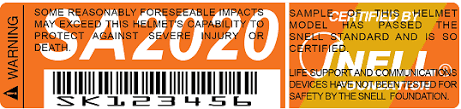
Helmets with a SA-2020 rating or higher are REQUIRED for all SCDA Events
Helmets with an M-rating are not Acceptable. Motorcycle helmets do not have the proper safety requirements for car use, specifically a rollbar multi-impact test.
Helmet Suppliers:
Dress Code
Long sleeves and long pants are suggested at all tracks. Open-toe shoes are not allowed. Drivers of competition cars are encouraged to wear fire-suits.
Convertible Policy
SCDA Convertible Policy
For safety reasons, all convertibles (Boxster, Miata, Corvette, BMW Z4, Honda S2000, Pontiac Solstice etc.) are required to have a roll bar that meets the following two criteria in order to be eligible to run during any event.
- The roll bar must be in the fixed position and visible at all times. This means that roll bars which are designed to automatically deploy are not acceptable unless they are in the full upright and locked position at all times.
- The roll bar must allow the driver to pass the “broomstick” test which means that the top of the drivers helmet must be below the line from the top of the roll bar to the top of the windshield.
There are aftermarket roll bars and/or seats which can be used to help meet these requirements. If your convertible meets these standards, then you are welcome to participate!
Most retractable Factory hard tops are acceptable at SCDA events, please verify.
Passengers
The ONLY time there may be a passenger on track is:
- If the Driver is a registered SCDA Instructor or Coach
- If the Passenger is a registered SCDA Instructor or Coach
- Non-entrant passengers MUST sign in and receive the proper wristband
Tech Inspection
Tech Inspection
All Cars must be brought to Tech Inspection prior to entering the track.
- Participants should bring their completed SCDA Tech Form to inspection with their helmets.
- Vehicles must be empty of items and have the numbers attached that are in the driver packet
- NOTE: Please visit Registration to get the event packet with the vehicle numbers in it. We cannot inspect a car that does not yet have the tech form and car numbers.
Lodging / Attractions
SCDA Discount Lodging near Palmer Motorsports Park
Suggested List of local lodging options near Palmer Motorsports Park:
Trainmasters Inn (Palmer, 5 miles)
Wedgewood Motel (Palmer, 5 miles)
Palmer Cabin (Palmer, 6 miles)
Laurel Ridge B & B (Warren, 5 miles)
Woodland Cabin (Warren, 5 miles)
Copper Lantern (West Brookfield, 7 miles)
Brookfield Inn B & B (Brookfield, 9 miles)
The Publick House (PMP Partner/Room rate, Sturbridge, 13 miles)
Sturbridge Host Hotel (PMP Partner/Room rate, Sturbridge, 13 miles)
Reeder Family Lodges (PMP Partner/Room rate, Sturbridge, 13 miles)
Super 8 Sturbridge (Sturbridge, 13 miles)
Hampton Inn (Sturbridge, 14 miles)
Sturbridge Comfort Inn (Sturbridge, 14 miles)
Econo Lodge (Sturbridge, 13 miles)
La Quinta Inn (Sturbridge, 13 miles)
Wilbraham Inn (Wilbraham, 14 miles)
Jenkins Inn & Restaurant (Barre, 22 miles)
Hampton Inn (West Springfield, 26 miles)
Stay at the Track
Palmer Motorsports Park Website
- Gate Hours: Gates open at 7am on the morning of events.
- Garage Rental: Carports and Garages are available at the event. Garages and Carports are $75
- Camping: Free Camping is allowed! All customers can arrive from 5 PM- 7 PM ONLY the night before. The gates will be locked after 7pm, but you are welcome to spend the night.
Local Attractions
Local Attractions near Palmer Motorsports Park